
A quick way to add lighting to your deck (with no wiring!)
DIY Curved Floating Deck
01.07.2023 - 16:29 / hometalk.com
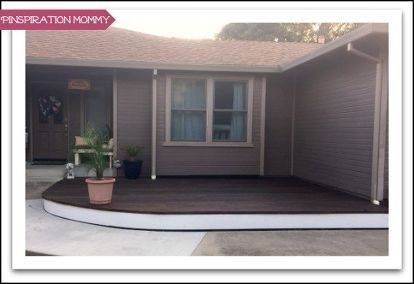
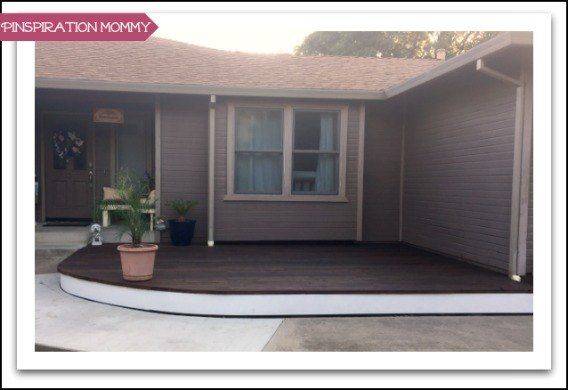
We have had an area of ugly rocks and dirt directly in front of our house since we moved in over 7 years ago. It has driven me CRAZY (which according to hubby is a short drive… :-P) It took me a while to figure out exactly what it was I wanted to do with this area and I finally settled on a DIY floating deck!
Here is what the area looked like prior to the new deck:
I know, bleh, right?! Just weeds, rocks, and dirt (mud when it rains). I had already added a border on the other side of the front of the house using concrete blocks, you can view that project here
That made the left side of the house look nice, but that area on the right side needed some serious help. So, in this area of ugly dirt, I decided to add a floating deck, since based on the instructions I found online, it looked completely doable as a one-person project and seemed like it would only take two or three weeks max… Ha ha ha! My eyes and stubborn mind definitely betrayed me this time! :-) Building this mostly by myself was definitely a lot harder and time consuming than what it seemed when I first took on this project!
Here is an abbreviated version of how I built my new DIY Floating Deck (and with a curve in it to follow the sidewalk!) For full details, including a list of supplies and detailed information, please visit my blog at the link at the bottom of this post.
First, I figured out the locations for my concrete deck blocks. The area I was building my deck in was ~13 feet x 20 feet at the longest points.
I began in the section with the highest ground level, digging down until the block was level with a block placed in the lowest area of ground (it's easier to dig down to level than it is to find dirt to fill up an area… ). I used a spare 12' 2x4 and a
The website greengrove.cc is an aggregator of news from open sources. The source is indicated at the beginning and at the end of the announcement. You can send a complaint on the news if you find it unreliable.
Top Autors
Popular Topics

hometalk.com
07.07.2023 / 21:43
DIY Deck Skirting
Whenever we would sit on our finished patio, all we could see was the eye-sore of our under deck. We didn’t like the look of traditional lattice but decided we needed to do something. We came across the idea to use wood slats and fell in love! This was an easy project that made a big impact on our outdoor space.

hometalk.com
03.07.2023 / 21:37
Build a Safety Gate to Match Your Deck
The steep stairs at the top of the deck were wide open and with a new puppy who loves to run, a gate was essential for his safety and to make sure he couldn’t run into the neighbors’ yards. I decided to create a swinging gate with a safety latch that matched the sunburst pattern on the rest of the deck. By cutting slats and attaching them in a similar pattern, I was able to produce a gate that matches perfectly with the design of the rest of the deck. It looks like it was built at the same time!


hometalk.com
30.06.2023 / 15:35
DIY Inexpensive Deck Rails Out of Steel Conduit, Easy to Do!
A post on how I built inexpensive deck rails out of steel conduit. Have you seen the gorgeous steel wire railings that have been populating Pinterest the last couple of years and gaining huge popularity? Well I sure have and I’ve been drooling over them for months and months… at least until I saw the price tag. It was an absolute no go for me, on top of that they do require tightening over time and that kinda bugged me too. I was leaning toward just wire fencing (yes like hog panels) but that felt too rough.

hometalk.com
30.06.2023 / 05:10
Stenciling a Wood Deck in a Diamond Pattern
I decided I wanted to give my outdoor deck an extra pop! and a great way to do that was in painting and then stenciling the wood deck.

hometalk.com
28.06.2023 / 04:43
Deck Makeover - Big Change for 250.00
Chuck and I bought our first house together in April 2014 and it has been one project after another...and yea we love it:) The deck looked OK at first, then the cheap red stain the seller had put on started coming off, a year later this is what it looked like — it was so ugly we had to do something. So Memorial Day weekend we power washed it for what seemed like hours and hours and did a full deck makeover.

hometalk.com
27.06.2023 / 07:29
Adding Lattice Privacy Screening to a Deck
We wanted to add a bit more privacy to our deck, and after thinking about different options, decided that lattice windows would work best. You can customize this look with as much or as little lattice as you want. In our situation, the openness of this design works great. It offers just the right amount of privacy screening, yet we can still enjoy the scenery. Another bonus is you can add some hooks and have plenty of room for hanging plants!

homesthetics.net
26.06.2023 / 13:53
15 Stunning Low-budget Floating Deck Ideas For Your Home
Spending time outdoors is an essential crucial part of a healthy lifestyle, one that eases the mind and delights the senses. And when it comes to your own backyard, the entire idea of a floating deck comes as a solution to how you can organize a small corner outside that will complete your backyard design whilst serving as an entertaining, relaxing space, the ideal vision for a summer night spent with friends and family. The simple structure of a floating deck confers an airy fresh vibe to your yard and offers all the necessary space you desire to organize an outdoors dinning area or a pallet lounge zone with little trouble. You can even take the idea further and build the deck around a majestic tree without it being connected to your actual house or terrace or, why not, around a round pool or Jacuzzi with the sole purpose of ultimate relaxation.

hometalk.com
25.06.2023 / 12:17
How To Save An Old Deck
We live in a very old farmhouse, and for lack of better words, the deck has seen better days.

hometalk.com
25.06.2023 / 12:17
How I Turned the Space Under My Deck Stairs Into a Deer Proof Garden!
I was constantly fighting with the deer in my neighborhood! Even though my backyard is fenced in, they are able to hop the fence easily and made quick work of anything I planted last year being it flowers or even a plum tree that they murdered! This year I wasn't messing around! plus I wanted to find a spot that was out of the way for my garden.

hometalk.com
25.06.2023 / 01:35
How to Make Floating Paper Lanterns
I think the most popular item I made for this dinner party was the floating lanterns and today I am excited to share with you how I made them. They came out great and are very easy to make.